Light, airy, and filled with rich matcha pastry cream, these Matcha Cream Puffs are a delightful fusion of classic French choux pastry and Japanese green tea flavor. The crisp golden shell gives way to a creamy, slightly bitter, and perfectly sweet matcha filling, making them an elegant dessert or teatime treat!
The best part? They look fancy but are surprisingly easy to make! Follow this step-by-step guide for foolproof results.
Let’s get started!
What You’ll Need
Ingredients for the Choux Pastry:
- ½ cup water
- ½ cup whole milk
- ½ cup unsalted butter (cubed)
- 1 teaspoon sugar
- ¼ teaspoon salt
- 1 cup all-purpose flour
- 4 large eggs (room temperature)

Ingredients for the Matcha Pastry Cream Filling:
- 1 ½ cups whole milk
- 2 tablespoons matcha powder
- ⅓ cup granulated sugar
- 3 large egg yolks
- 2 tablespoons cornstarch
- ¼ teaspoon salt
- 2 tablespoons unsalted butter
- ½ teaspoon vanilla extract
- ½ cup heavy cream (whipped, for extra lightness)
Tools:
- Saucepan
- Mixing bowls
- Electric mixer or whisk
- Piping bag with round or star tip
- Baking sheet
- Parchment paper
Pro Tips
- Use high-quality matcha. Ceremonial or culinary grade works best for vibrant color and smooth flavor.
- Don’t open the oven early. The puffs need steam to rise properly—opening too soon can cause them to deflate.
- Whisk constantly while making pastry cream. This prevents lumps and creates a smooth texture.
- For extra crispness, pierce each puff after baking to release steam, then let them dry in the oven with the door slightly open.
- Chill the pastry cream completely before filling the puffs to ensure a firm texture.
How to Make It
Step 1: Make the Choux Pastry

- Preheat the oven to 400°F (200°C) and line a baking sheet with parchment paper.
- In a medium saucepan, combine water, milk, butter, sugar, and salt. Bring to a boil over medium heat.
- Remove from heat and immediately add flour, stirring vigorously until the mixture forms a smooth dough ball.
- Return to low heat, stirring for 1–2 minutes to remove excess moisture.
- Transfer the dough to a mixing bowl and let it cool slightly.
- Add eggs one at a time, mixing well after each addition until smooth and glossy.
- Transfer the dough into a piping bag fitted with a round or star tip. Pipe small mounds onto the parchment-lined baking sheet.
- Bake for 20–25 minutes, or until golden brown and puffed.
- Let cool completely before filling.
Step 2: Make the Matcha Pastry Cream
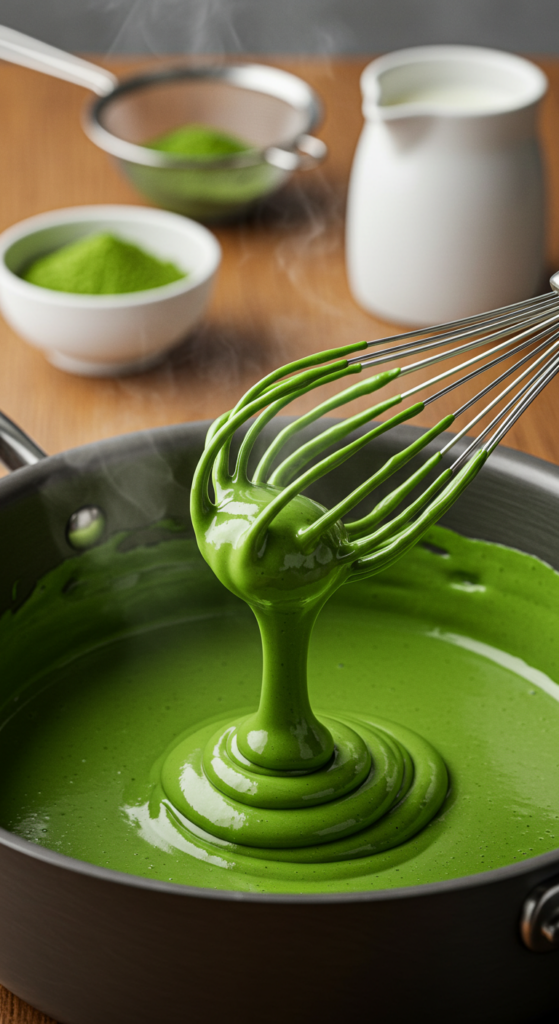
- In a saucepan, heat milk over medium heat until warm but not boiling.
- In a separate bowl, whisk egg yolks, sugar, cornstarch, and salt until smooth.
- Slowly pour the warm milk into the egg mixture while whisking constantly.
- Return the mixture to the saucepan and cook over medium heat, whisking until thickened (about 3–4 minutes).
- Remove from heat and stir in butter, vanilla extract, and matcha powder until fully combined.
- Cover with plastic wrap (press it directly onto the cream) and chill for at least 2 hours.
- Once chilled, fold in whipped heavy cream for an extra light texture.
Step 3: Assemble the Cream Puffs

- Slice the tops off the cooled cream puffs, or pierce the bottom with a piping tip.
- Fill a piping bag with matcha pastry cream and pipe into each puff.
- Replace the tops and dust with powdered sugar or extra matcha powder for a beautiful finish.
Leftovers and Storage
- Refrigerate: Store filled cream puffs in an airtight container for up to 2 days.
- Freeze: Unfilled choux pastry shells can be frozen for up to 2 months. Re-crisp in the oven before filling.
Conclusion
These Matcha Cream Puffs are the perfect combination of crispy, airy choux pastry and velvety, rich matcha cream. Whether you enjoy them as an elegant dessert or a tea-time treat, they’re guaranteed to impress!
Try this recipe and let me know how it turned out! Did you add any fun twists? Happy baking! 🍵✨